
Automatically Add Form Leads to Newsletter Service
Step by Step Instructions on integrating form leads automatically into Urable
Here is the software you will want to be logged in on:
- Zapier - Zapier will connect apps and services together to automate repetitive tasks and save you time.
- Newsletter Service such as Mailchimp, Active Campaign, Constant Contact.
- Google Sheets
Note: The free plan of Zapier has a 15 minute update time. Which means a form lead from the website will not be instantaneous unless you elect to upgrade your plan.
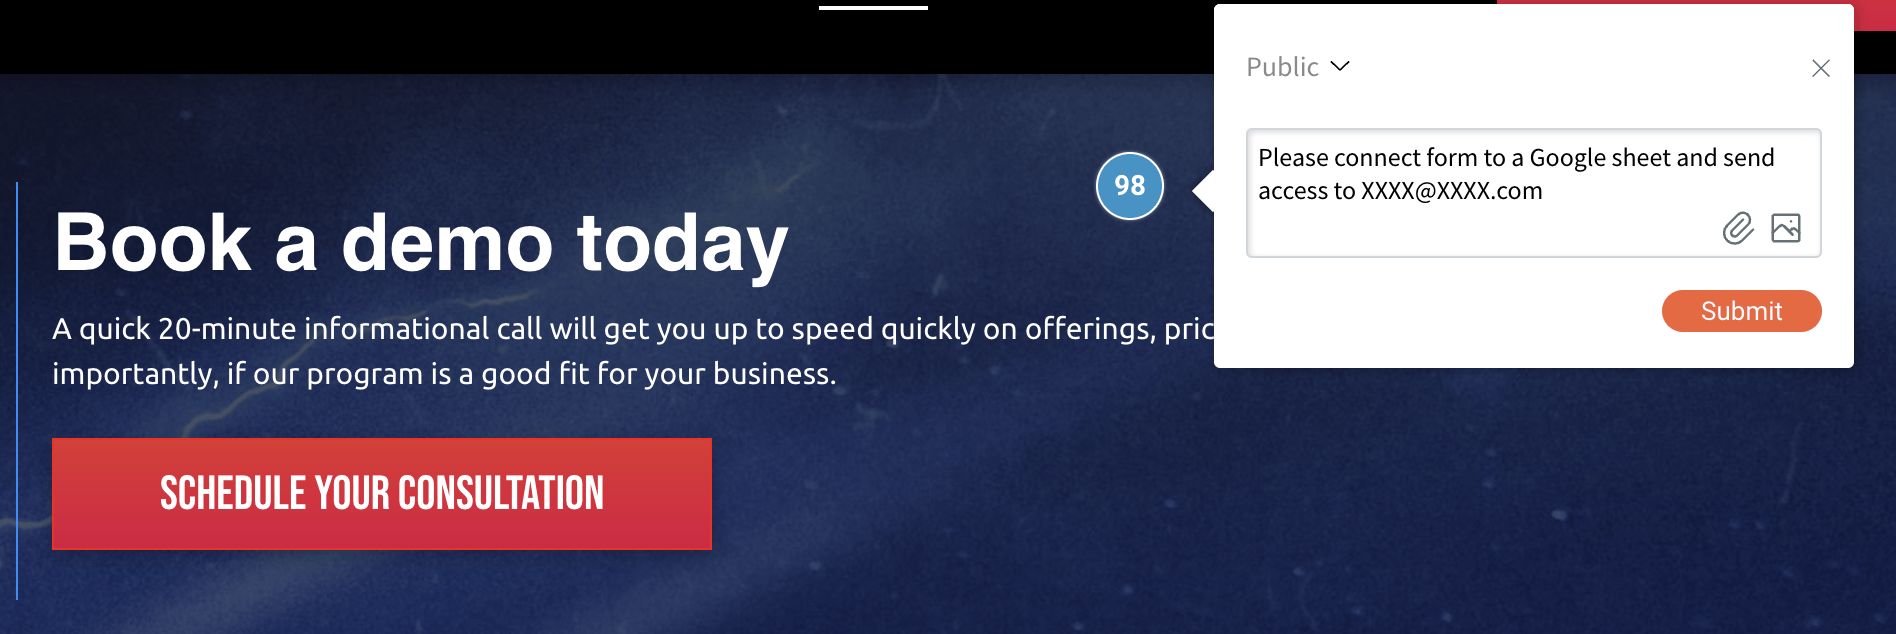
Step 1: Leave us a Comment on Your Site
Alert! If we have previously connected your website form to Google Sheets, you would use that preexisting google sheet. Skip step 1 and connect the pre-existing sheet in step 2.
Step 1: Request Google Sheet Intregration via your Website Comment
- Current customers, Login to your website
- Leave a comment on your site and indicate to us which email you want us to share a Google Sheet with.
Example "Please connect form to a Google sheet and send access to <insert your google email>" - It typically takes us 1 business day to integrate and setup your contact form into a Google sheet. We will send you an email once this is complete.
The rest is your step-by-step in Zapier/Urable
Create a Zapier account
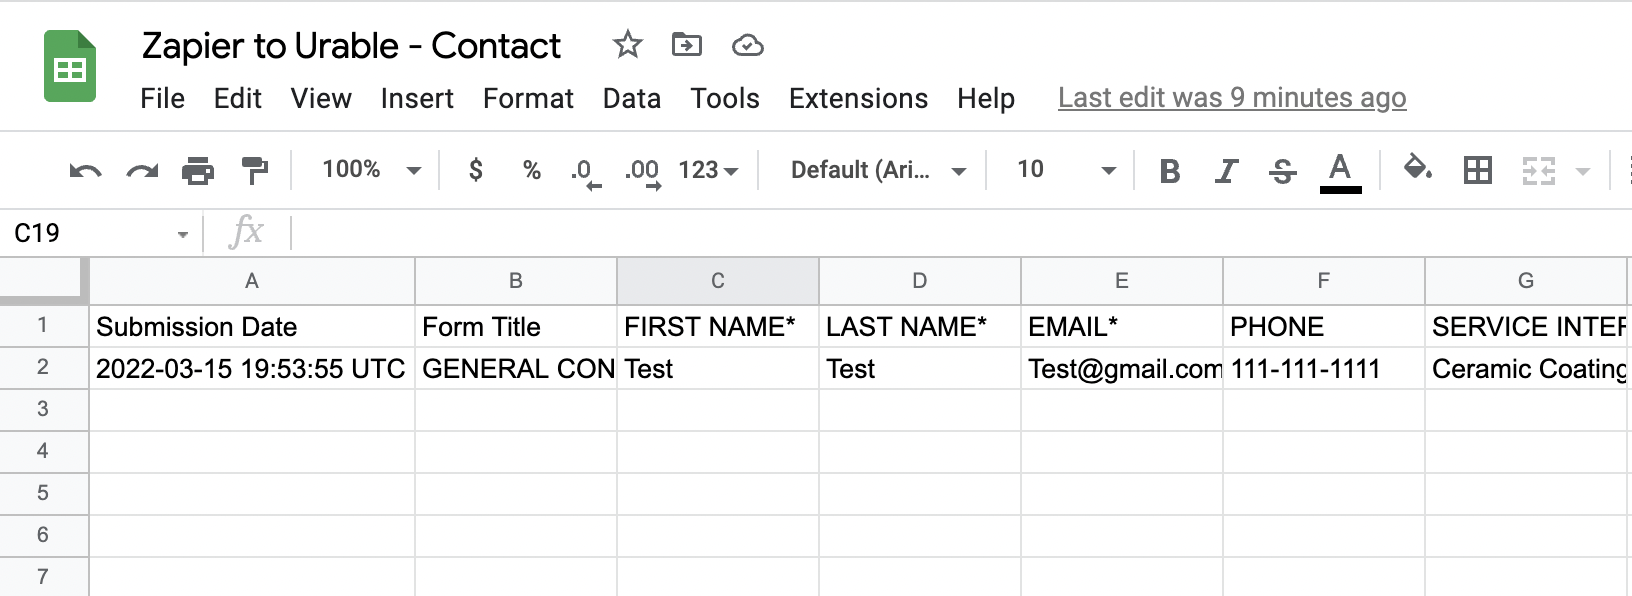
Step 2: Ensure Your Google Sheets are Integrated
Detailer's Roadmap will do all the steps on our side to ensure this is set up properly. You need to make sure you have the Google Sheets access available in your google account.
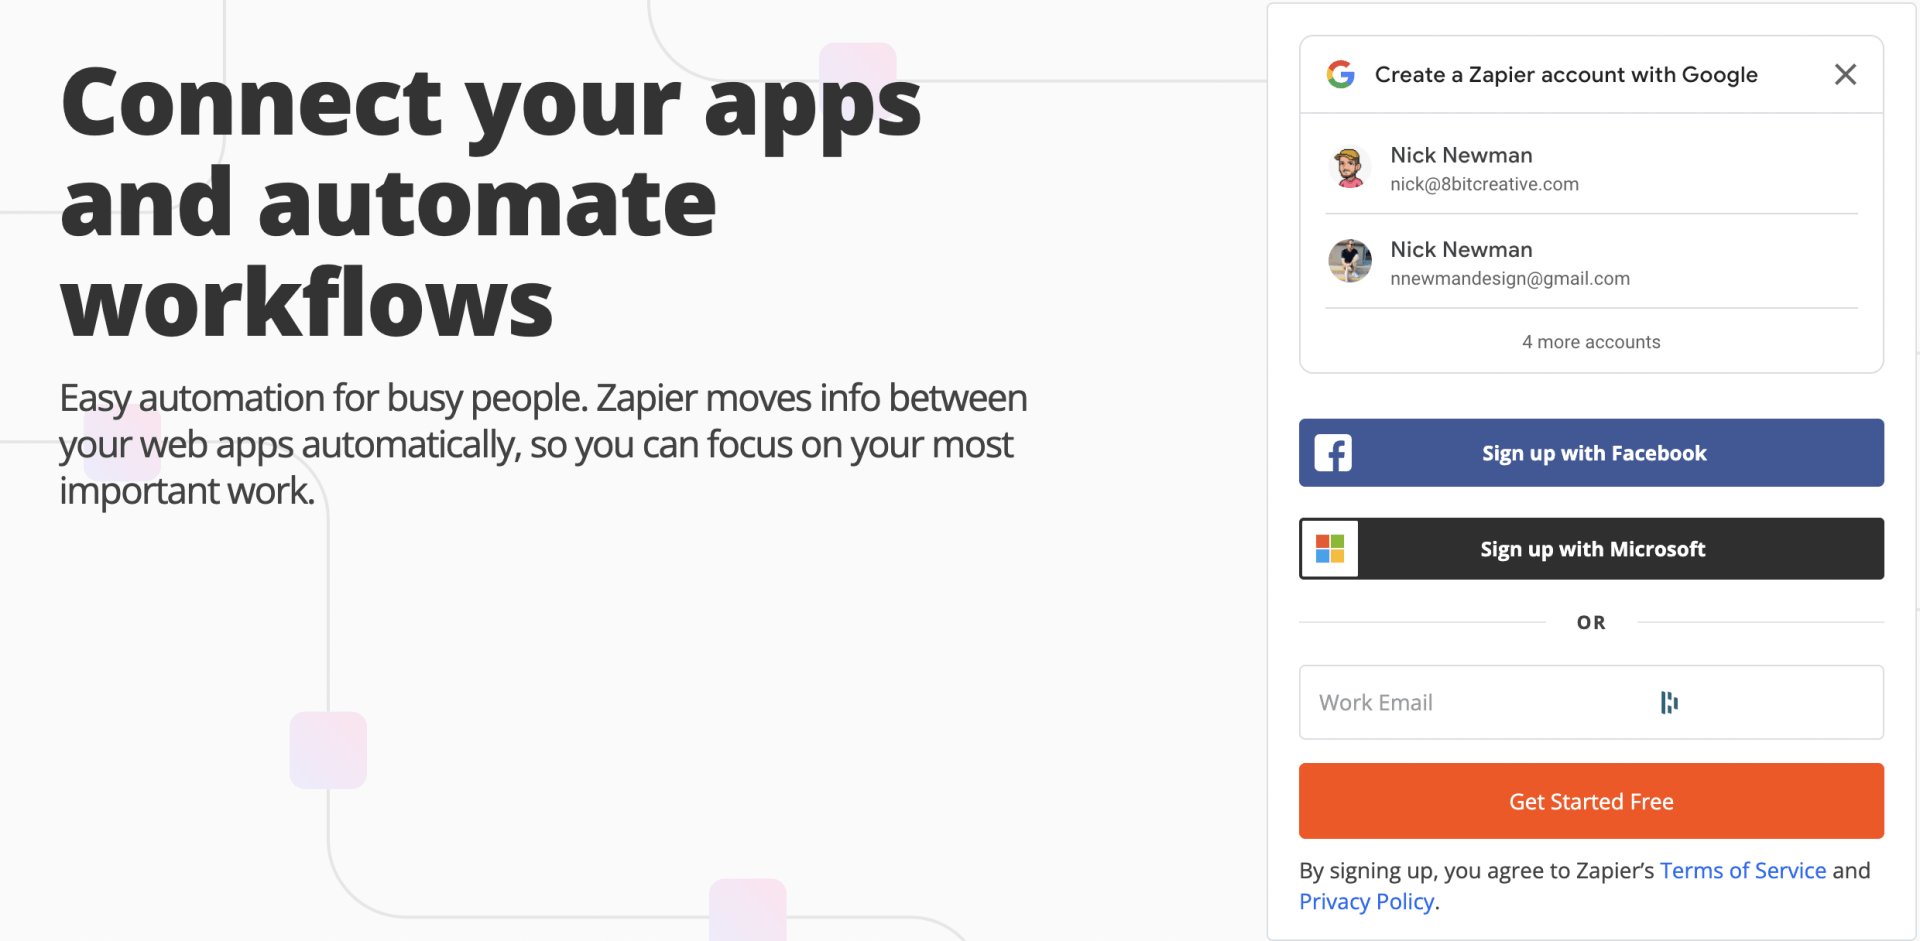
Step 3 Create / Log In to Your Zapier Account
Creating a Zapier account is fast, easy, and free. Fill out the requested information and finish creating your account. If you have an account, Log into your account.
Setup your Zap from Google Sheets to Your Preferred Email Newsletter Service
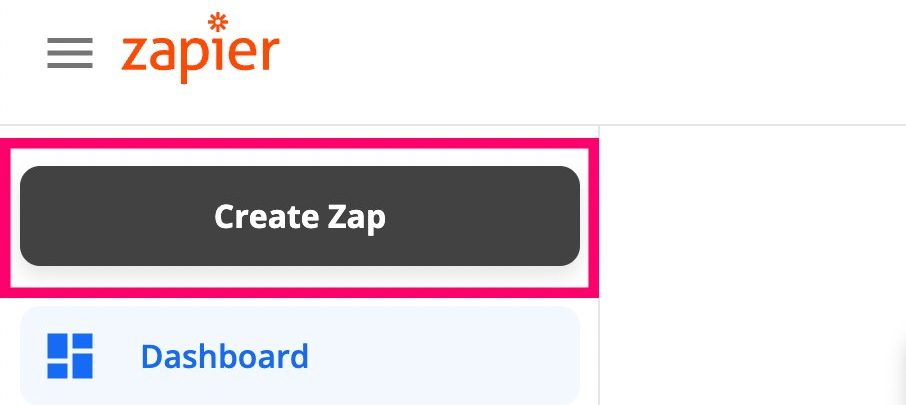
Step 4: Click 'Create a new Zap' in the top left corner of your Dashboard
After logging in or creating your account, you will be sent to your Dashboard. From there to start creating your Zap to integrate with your contact form, click 'Create Zap' on the top left corner of your screen.
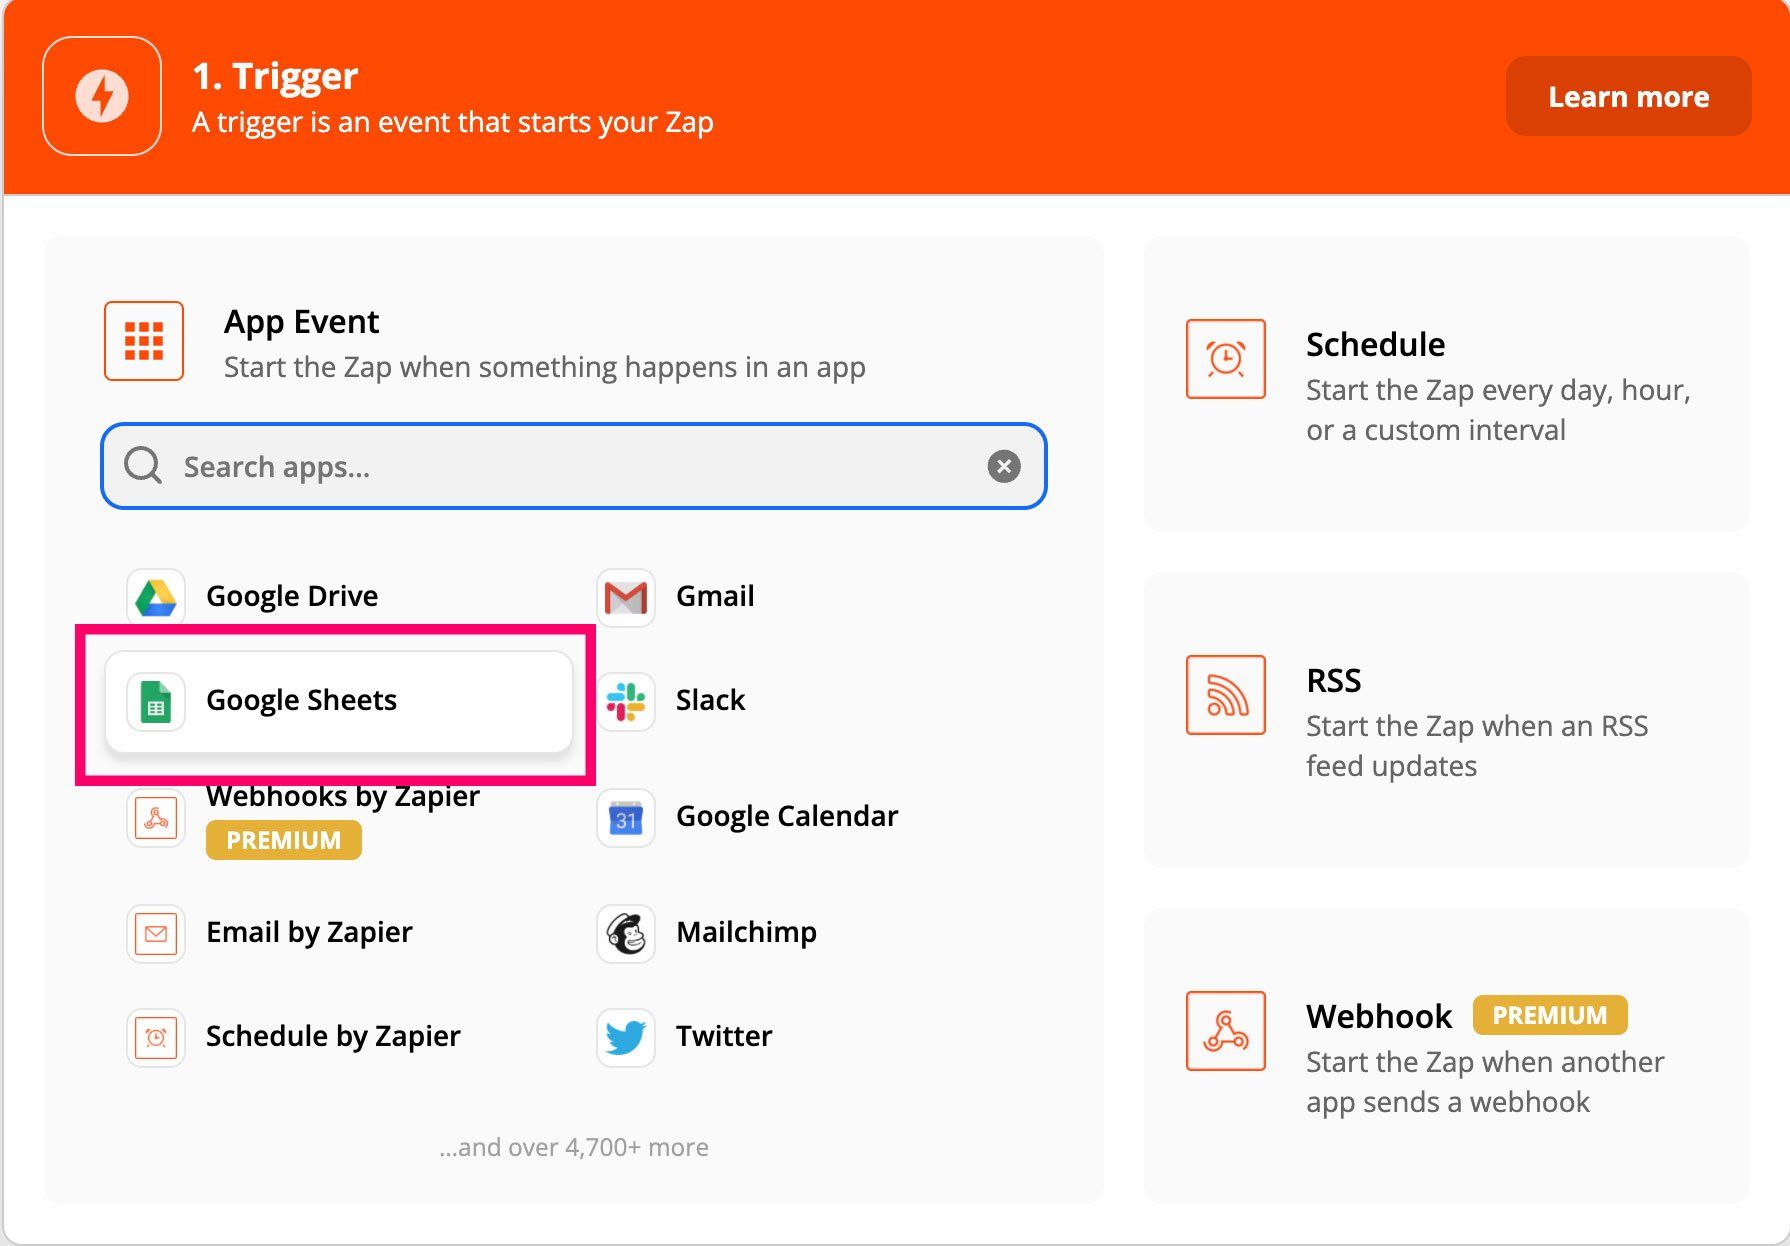
Step 5: Click 'Google Sheets' Under First Section
For the first section of creating a new Zap, make sure you click 'Google Sheets'. You can also rename your Zap at the top left screen at any time. It is important to have your zaps named, to ensure you know what the action does.
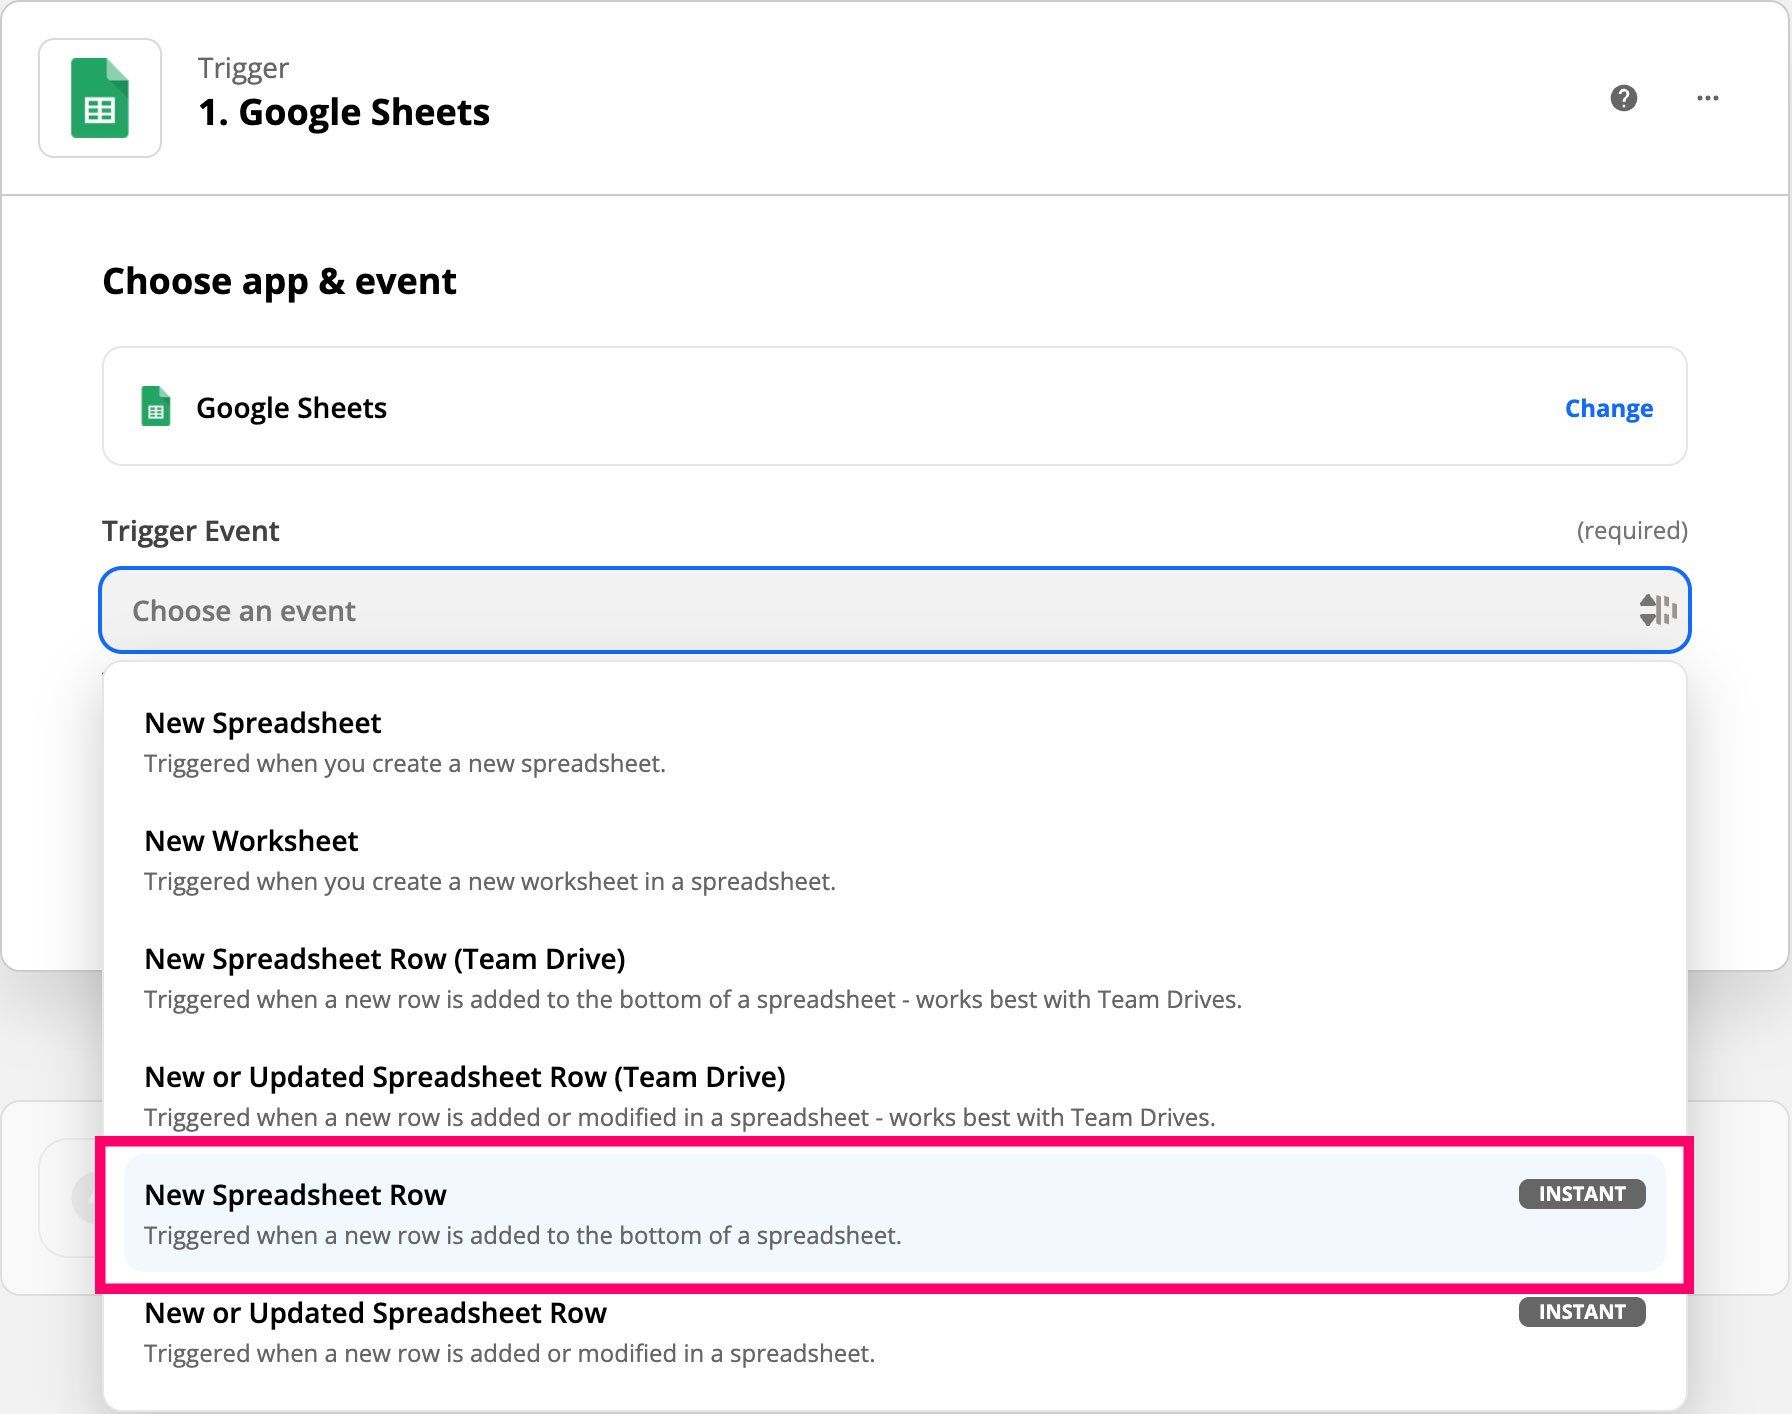
Step 6: Under Trigger Event, Click 'New Spreadsheet Row'
This will tell Zapier to intrigrate a new customer into Urable any time there is a new row formed on your contact form spreadsheet.
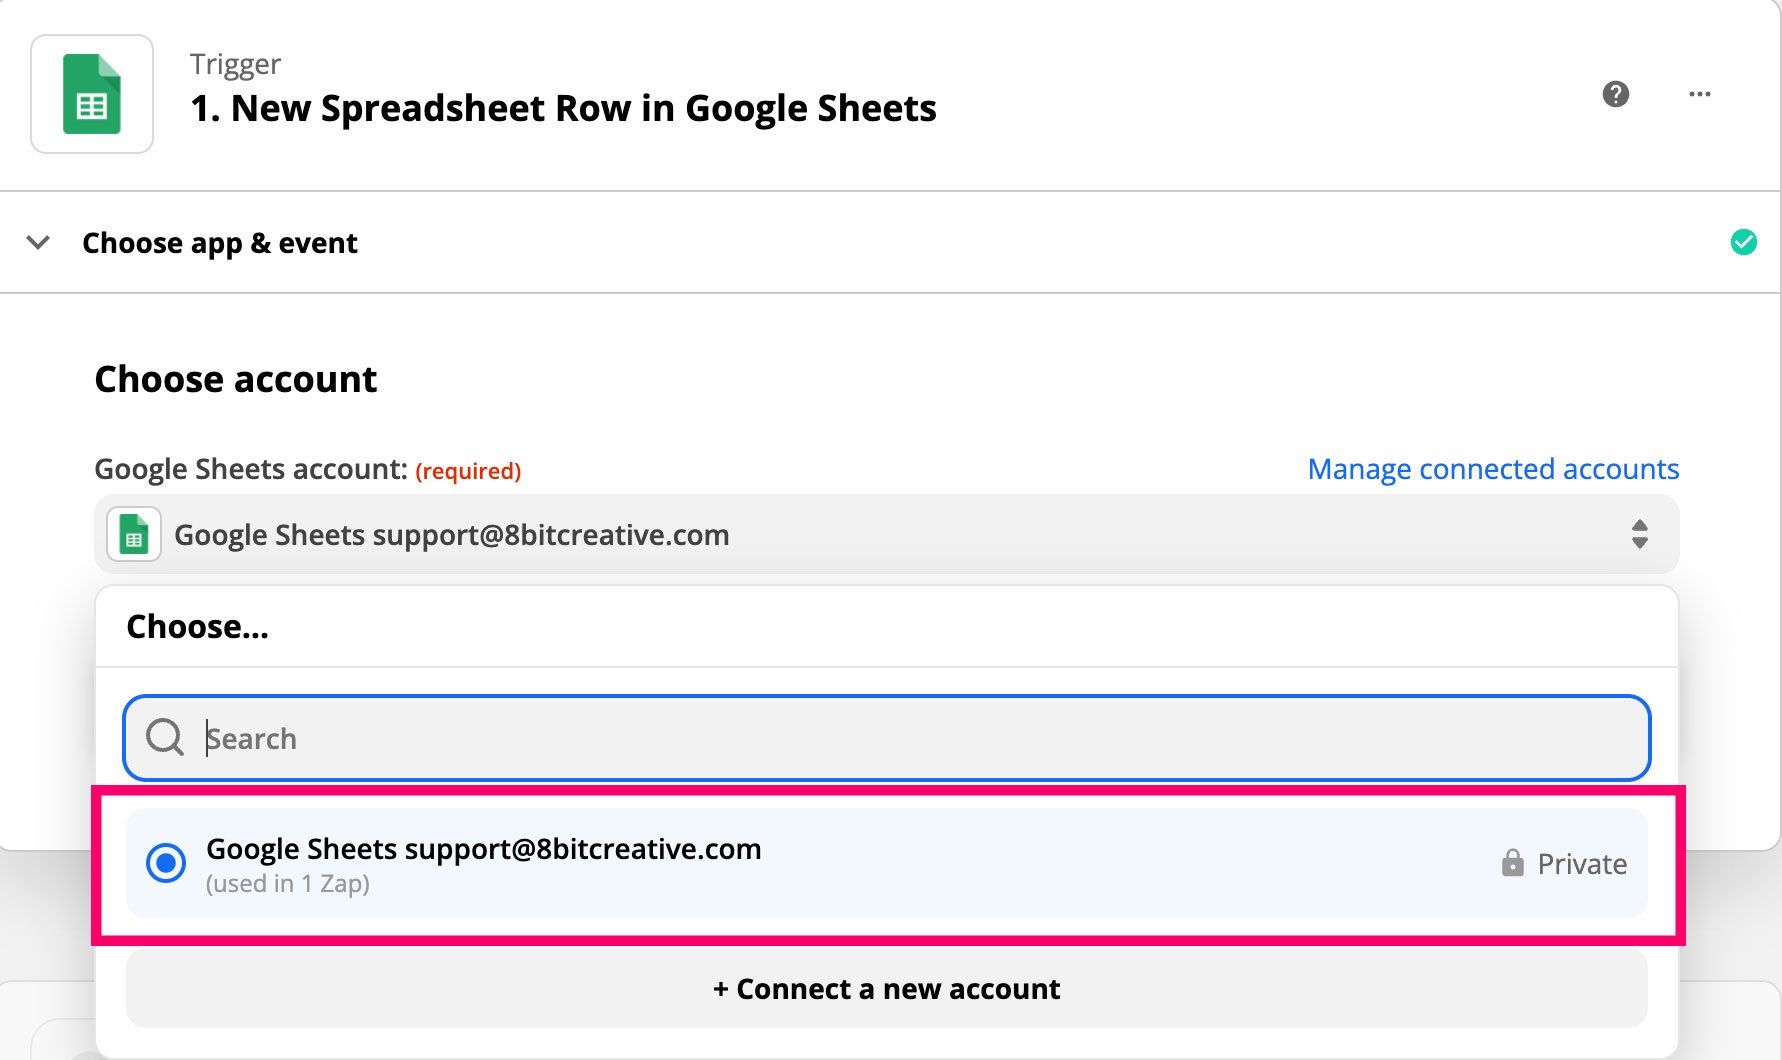
Step 7: Connect Google Drive Account and Select Under 'Choose Account'
Make sure that your correct Google account is selected, this would of been connected to the email you gave us. If it does not have the spreadsheet shared or created from that profile, nothing will show up for your spreadsheet selection.
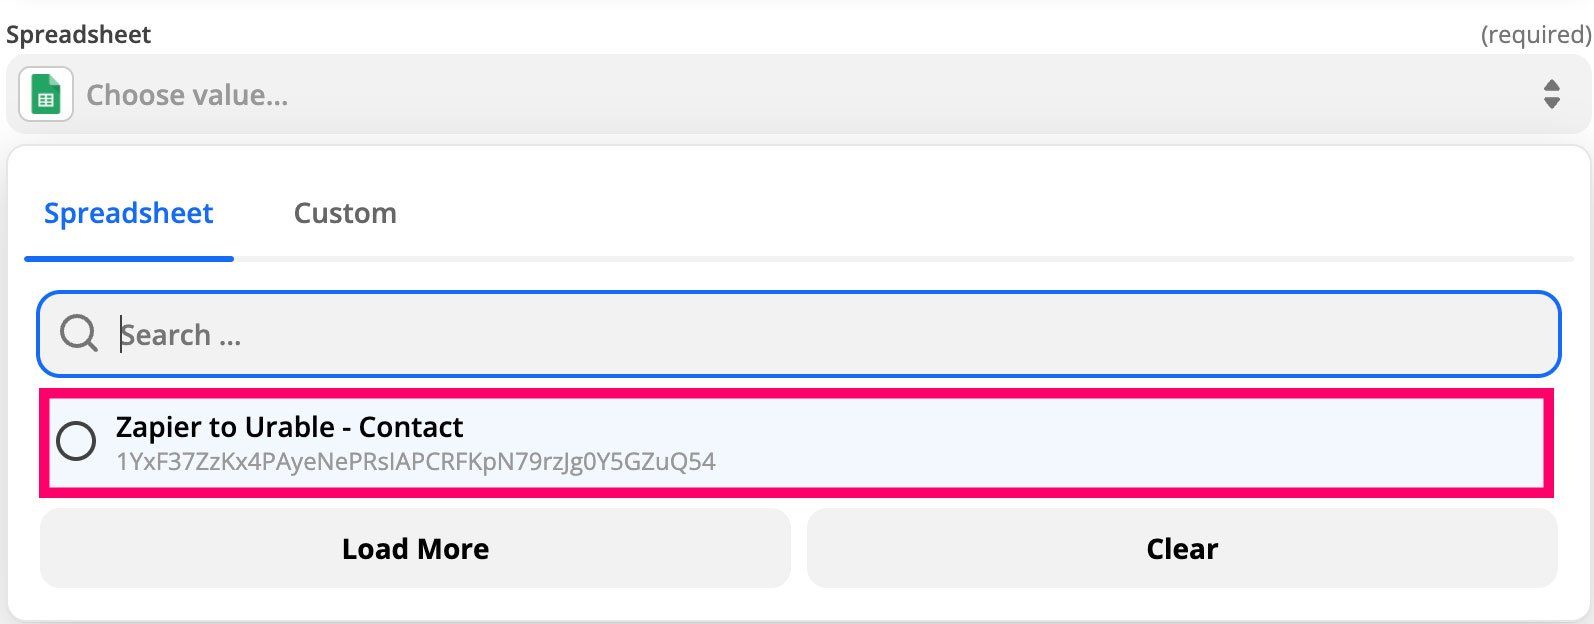
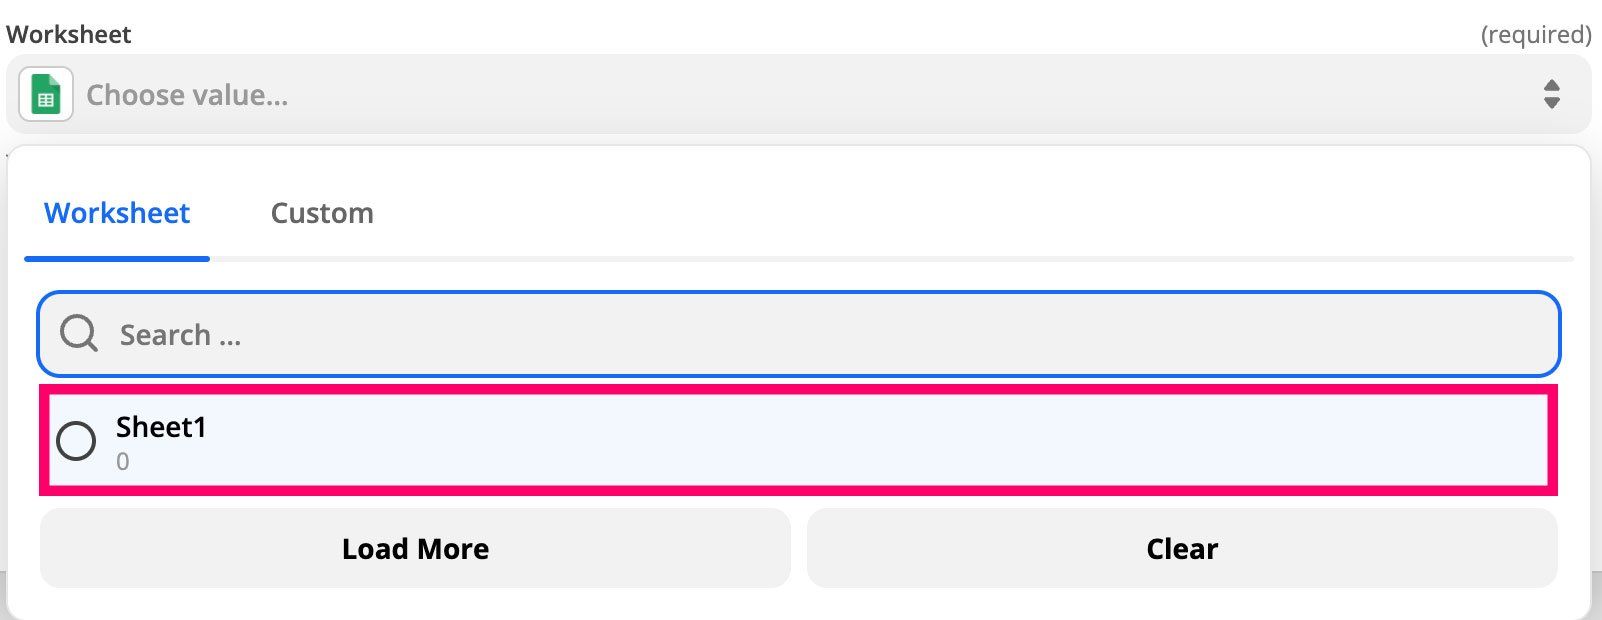
Step 8: Select the Contact Form Google Sheet and Select the Correct Sheet
Make sure to select the correct Google Sheet if your account has multiple sheets in your drive. From there, select the right sheet in your document. If you only have one sheet, there will only have one selection.
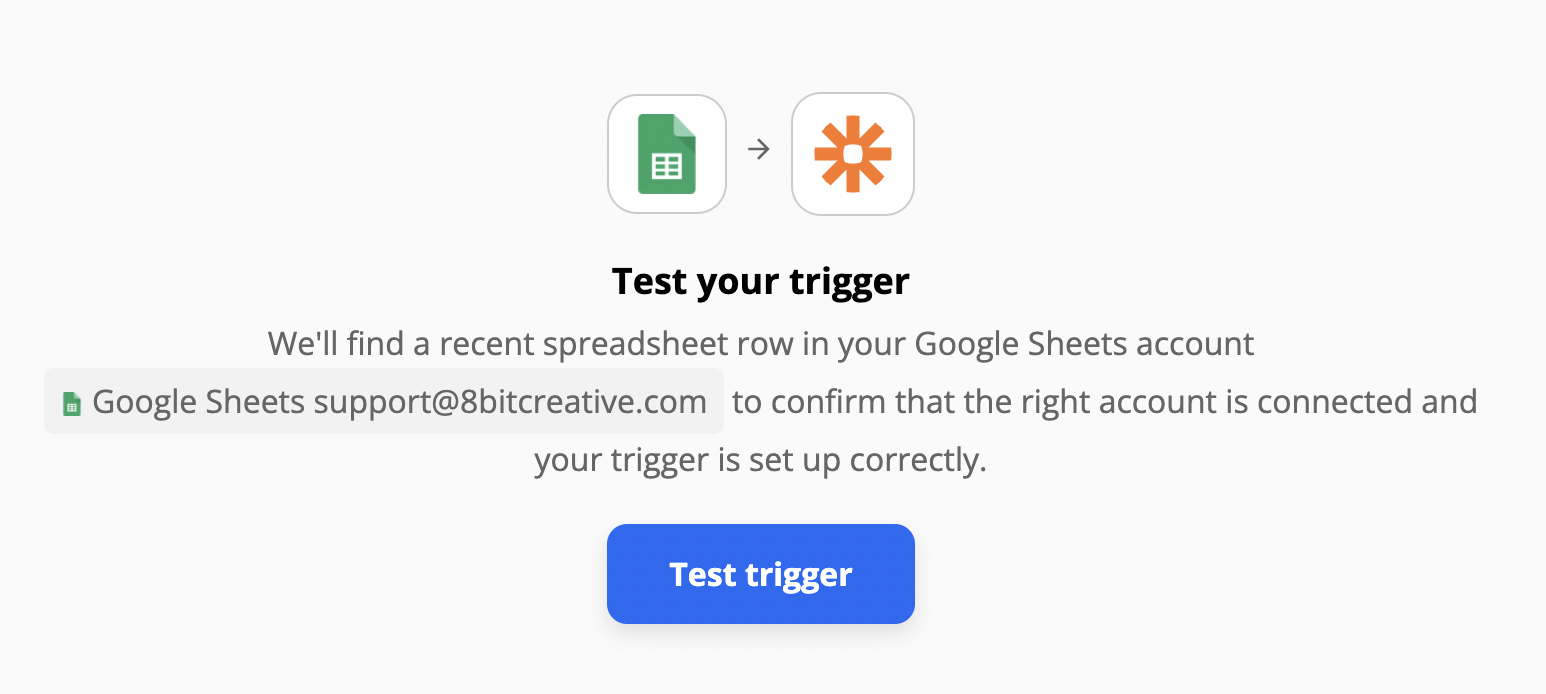
Step 9: Click 'Test Trigger'
To advance to the next steps, it is important to make sure your trigger works. Click the 'Test Trigger' button and see if the spreadsheet inputs below. If it looks correct, move onto setting up actions.
Setting Up Actions for your Zap
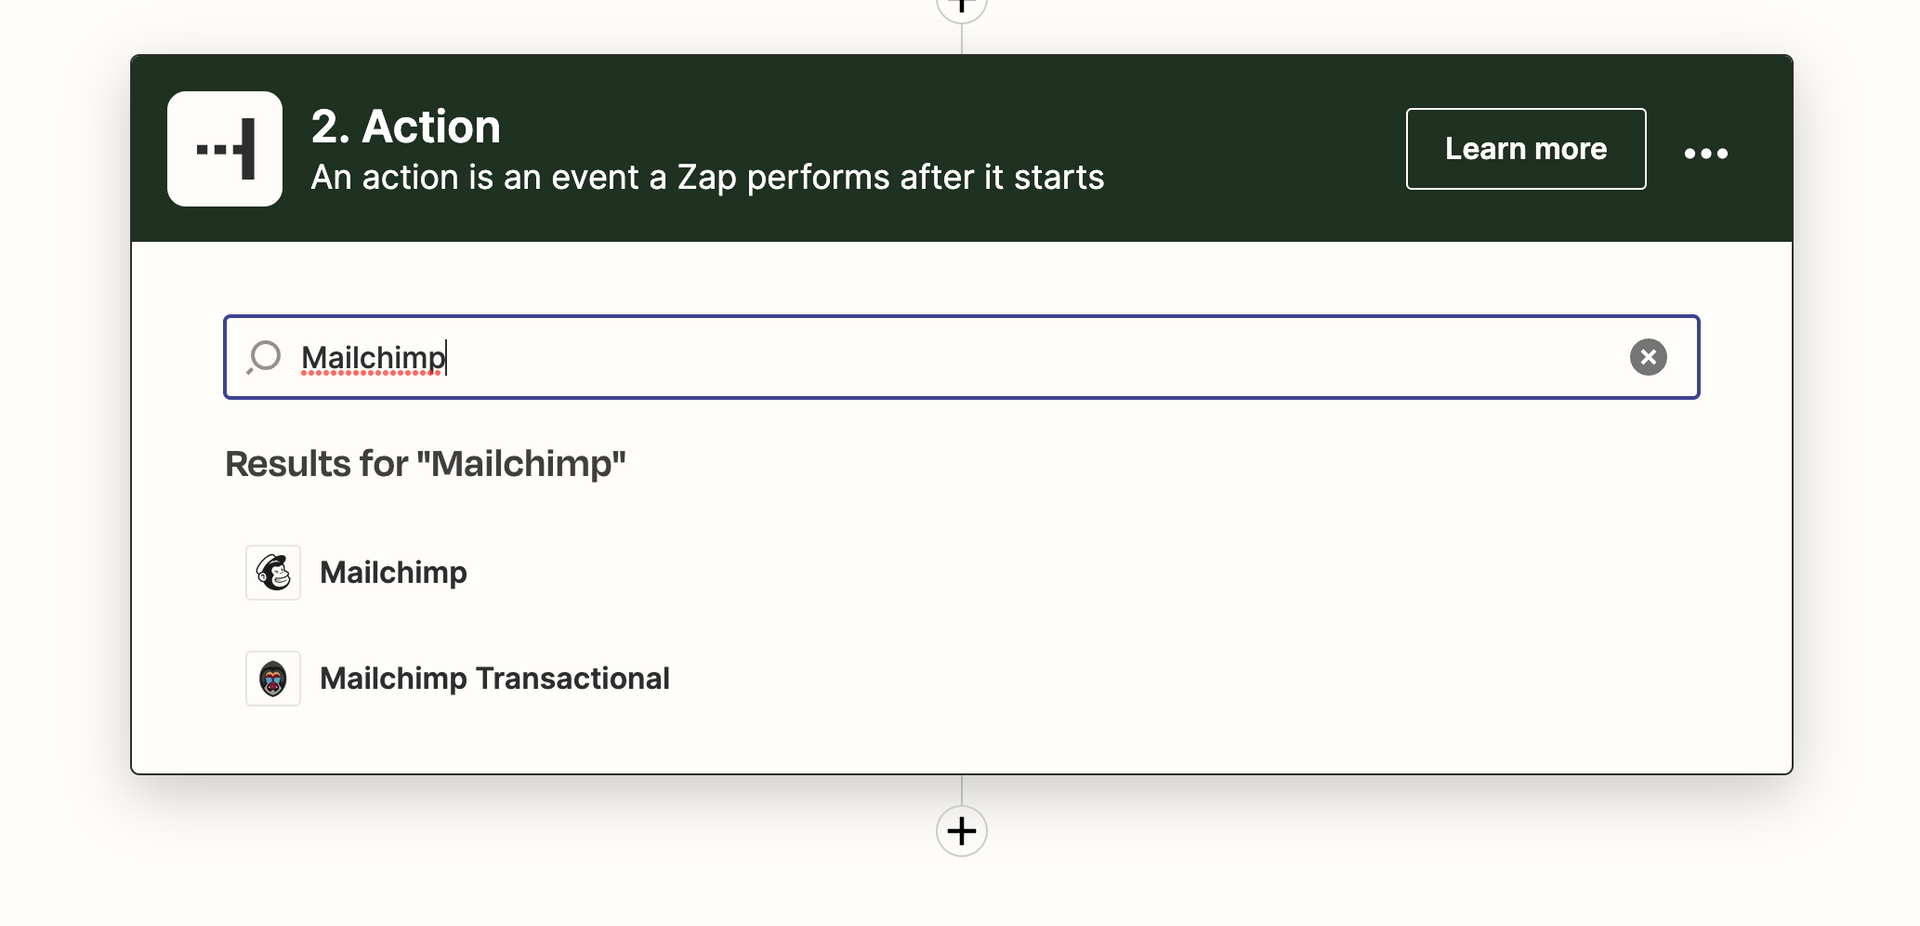
Step 10: Create an Action with your Selected App/Newsletter Service
Required: You will want to have a newsletter account setup prior to this.
Find your selected newsletter service and click that software. It will require you to login and authorize that app to connect.
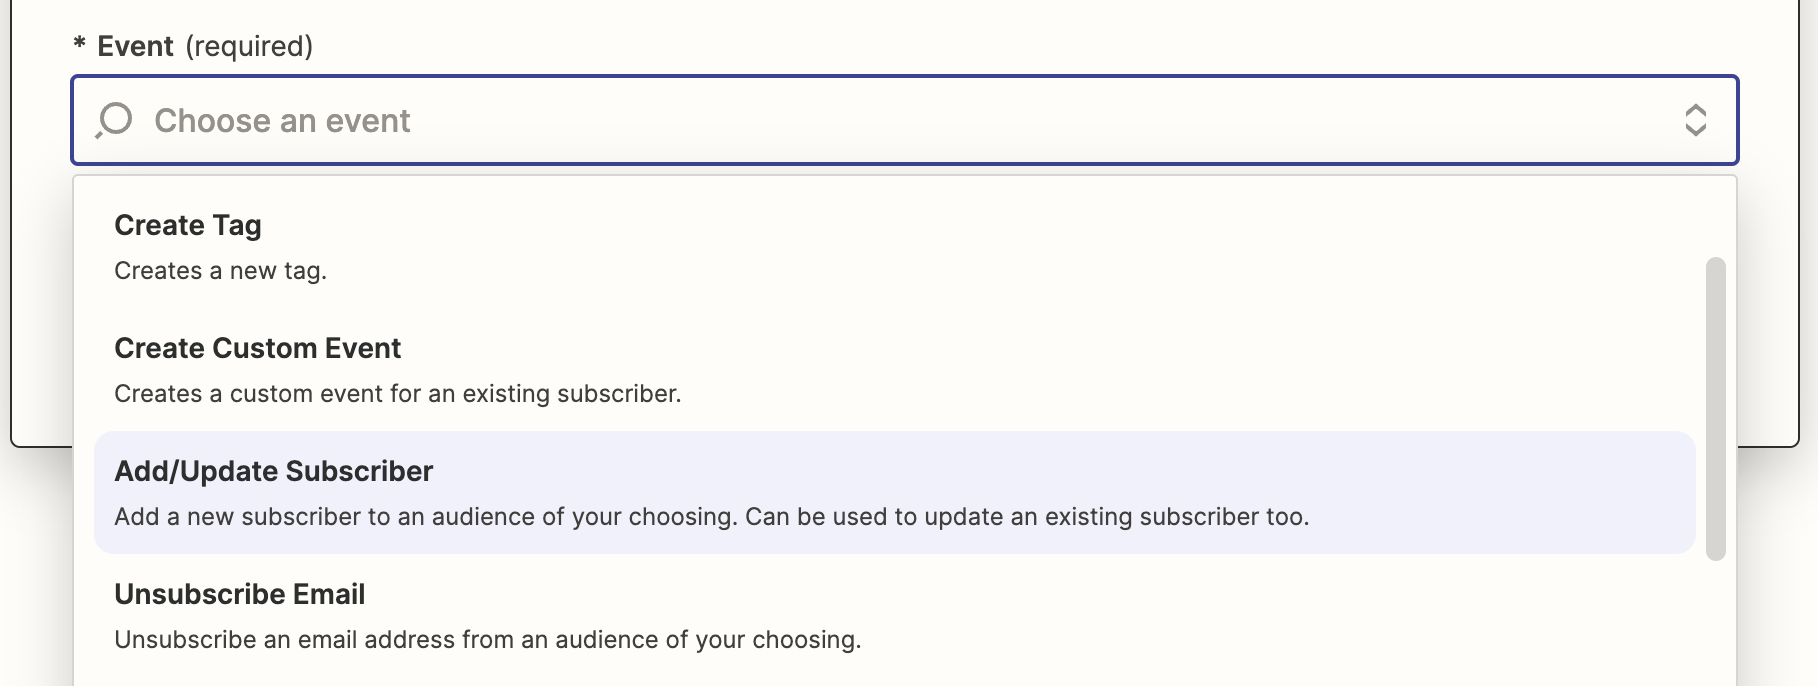
Step 11: Under Event, Click 'Add/Update Subscriber'
This messaging may be slightly different depending on what newsletter service you are using. In this example it is MailChimp.
Click continue.
Select your Mailchimp account. Then Click continue.
Step 13: Fill Out Action Section
You need create an Audience that all new form submissions enter. We suggest creating one in your newsletter service PRIOR to this step. Something like New Subscribers would work.
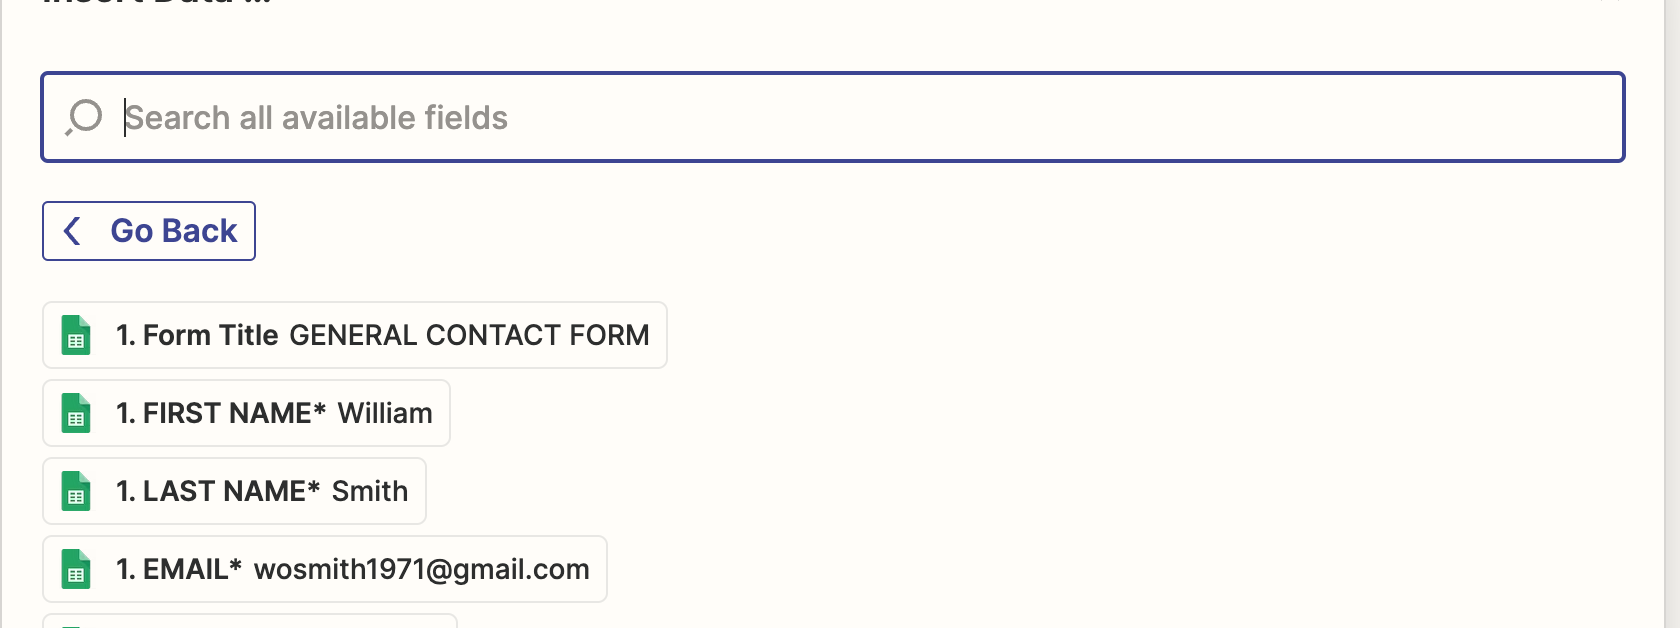
Next, you want to fill out all the values that come through in your Google spreadsheet and contact form. For most companies, name, email and phone number are all that is required. If you have any more sections in your form that appear in Zapier, make sure to add them. Below are the most common values and how to set them up properly.
First Name & Last Name: Make sure for the Name section, you select 'First Name' Hit SPACE, then Click 'Last Name', then change the type below to 'Person'.
Email: Click 'Email' in the drop down box. It might be below other options, if so click 'View More' to see it and select it.
Phone: Similar to above, click Phone in the drop down box.
When complete, hit continue.
Step 14: Test and Activate Zap
Now that all the proper information is inserted, now it is time to test your zap. Click 'Test and Continue' for Zap to see if the connection with Urable is working properly. If everything looks good, then you can turn on your Zap and every contact form submission is inserted directly into your customer list.


And You're Done!
Time to start emailing. We suggest that this a perfect time to setup email flows and automations to tell customers on why your shop is the best around!